Address
304 North Cardinal St.
Dorchester Center, MA 02124
Work Hours
Monday to Friday: 7AM - 7PM
Weekend: 10AM - 5PM
Address
304 North Cardinal St.
Dorchester Center, MA 02124
Work Hours
Monday to Friday: 7AM - 7PM
Weekend: 10AM - 5PM

Have you noticed your engine struggling to start or stalling out lately? It might be time for a thorough carburetor cleaning to get your equipment running smoothly again.
Most people feel worried about working on small engines at home. However, regular engine maintenance is actually quite simple once you learn the basic steps.
A dirty carb often causes poor performance and wasted fuel during normal operation. By following a few basic steps, you can restore your machine’s power without visiting a repair shop. Proper care ensures your favorite tools and toys last for many years to come.
Cleaning your internal components helps prevent long-term damage and expensive replacements. This process allows you to understand how your engine functions while saving money. You will find that keeping parts clean is the best way to ensure reliability.
A clean carburetor is vital for ensuring your engine runs smoothly and efficiently. The carburetor mixes air and fuel for the engine, and any dirt or deposit can disrupt this delicate balance, leading to performance issues.
Dirt and deposits in the carburetor can cause a range of problems, from rough idling to engine stalling. When the carburetor is clogged, it can’t provide the correct air-fuel mixture, leading to decreased engine performance and potentially causing damage over time.
The impact of dirt and deposits can be seen in several areas:
Neglecting carburetor maintenance can lead to costly repairs down the line. A dirty carburetor can cause engine damage, leading to expensive fixes. Regular cleaning is a simple and cost-effective way to prevent these issues.
| Maintenance Task | Cost | Frequency |
|---|---|---|
| Carburetor Cleaning | $50-$100 | Every 6-12 months |
| Engine Repair due to Neglect | $500-$1000 | As needed |
As shown in the table, regular carburetor cleaning is a fraction of the cost of repairing engine damage caused by neglect. This makes it a crucial part of engine maintenance and overall car repair strategy.
A dirty carburetor can cause a range of problems, and knowing the warning signs can help you take action early. Your vehicle’s engine relies heavily on the carburetor to mix the correct proportion of air and fuel for combustion. When the carburetor becomes clogged with dirt and deposits, it can lead to various performance issues.
One of the most common signs that your carburetor needs cleaning is rough idling or engine stalling. When the carburetor is dirty, it can’t provide a consistent flow of fuel, causing the engine to run unevenly. This can be particularly noticeable when you’re stopped at a red light or idling in traffic.
If you find that your vehicle is hard to start, it could be a sign that your carburetor is clogged. A dirty carburetor can prevent the engine from getting the fuel it needs to start properly. This is often accompanied by a rough idle once the engine is running.
A dirty carburetor can also cause your vehicle to accelerate poorly or feel like it’s losing power. This happens because the carburetor is not providing the correct mixture of air and fuel, leading to a decrease in engine performance. You might notice this when trying to merge onto a busy highway or climb a steep hill.
Black smoke coming from your exhaust pipe is another indicator that your carburetor needs attention. This smoke is often a sign that the carburetor is providing too much fuel, which can also lead to increased fuel consumption. A dirty carburetor can cause your vehicle to guzzle more gas than usual, increasing your fuel costs.
Here are some key signs that your carburetor needs cleaning summarized in a table:
| Signs | Description |
|---|---|
| Rough Idling and Engine Stalling | Engine runs unevenly or stalls due to inconsistent fuel flow. |
| Difficulty Starting Your Vehicle | Hard to start the engine due to clogged fuel passages. |
| Poor Acceleration and Power Loss | Decreased engine performance due to incorrect air-fuel mixture. |
| Black Smoke and Increased Fuel Consumption | Excessive fuel consumption and black smoke from the exhaust. |
To ensure a successful carburetor cleaning process, you need to prepare the appropriate equipment and supplies. Having the right tools at hand makes the task more efficient and helps achieve better results.
When it comes to cleaning your carburetor, having the right tools is crucial. Some of the essential tools include:
These tools will help you disassemble and clean the carburetor effectively. Using the correct tools minimizes the risk of damaging the components.
The right cleaning solution is vital for removing dirt and grime from your carburetor. Look for a carburetor cleaning solution that is specifically designed for this task. Some popular options include:
When choosing a cleaning solution, consider the type of dirt and grime you’re dealing with. Always follow the manufacturer’s instructions for the best results.
Safety should be your top priority when working with cleaning chemicals and tools. Essential safety gear includes:
By wearing the appropriate safety gear, you can protect yourself from potential hazards associated with carburetor cleaning.
Before diving into the carburetor cleaning process, it’s crucial to prepare your vehicle and workspace to ensure a safe and effective operation. This step is often overlooked but is vital for a successful cleaning process. By taking the time to properly prepare, you can avoid potential hazards and ensure that the job is done correctly.
One of the first steps in preparing your workspace is to choose a well-ventilated area. This is an important safety precaution because carburetor cleaning involves the use of chemicals that can release harmful fumes. Working in a well-ventilated area helps to prevent the inhalation of these fumes, reducing the risk of health issues.
Ideally, you should work outdoors or in a garage with the door open. If you’re working in a confined space, consider using a fan to improve ventilation. This simple step can significantly reduce the risks associated with carburetor cleaning.
Another critical safety precaution is disconnecting the battery before you start cleaning the carburetor. This helps to prevent any accidental engine starts, which can cause injury or damage. To disconnect the battery, locate the negative battery cable and loosen the nut that holds it in place. Then, pull the cable off the negative terminal.
It’s also a good idea to consult your vehicle’s repair manual for specific instructions on how to disconnect the battery for your particular vehicle. This is a simple but effective automotive tip that can help ensure your safety.
Allowing the engine to cool is another essential step in preparing your vehicle for carburetor cleaning. A hot engine can cause burns and other injuries, and some cleaning solutions may not be effective or could be dangerous when used on a hot engine.
It’s recommended to let the engine cool for at least 30 minutes before starting the cleaning process. This will help ensure that you’re working with a safe and stable environment.
| Preparation Step | Importance | Action |
|---|---|---|
| Choosing a Well-Ventilated Area | High | Work outdoors or ensure good airflow |
| Disconnecting the Battery | High | Prevent accidental engine starts |
| Allowing the Engine to Cool | High | Prevent burns and ensure safe cleaning |

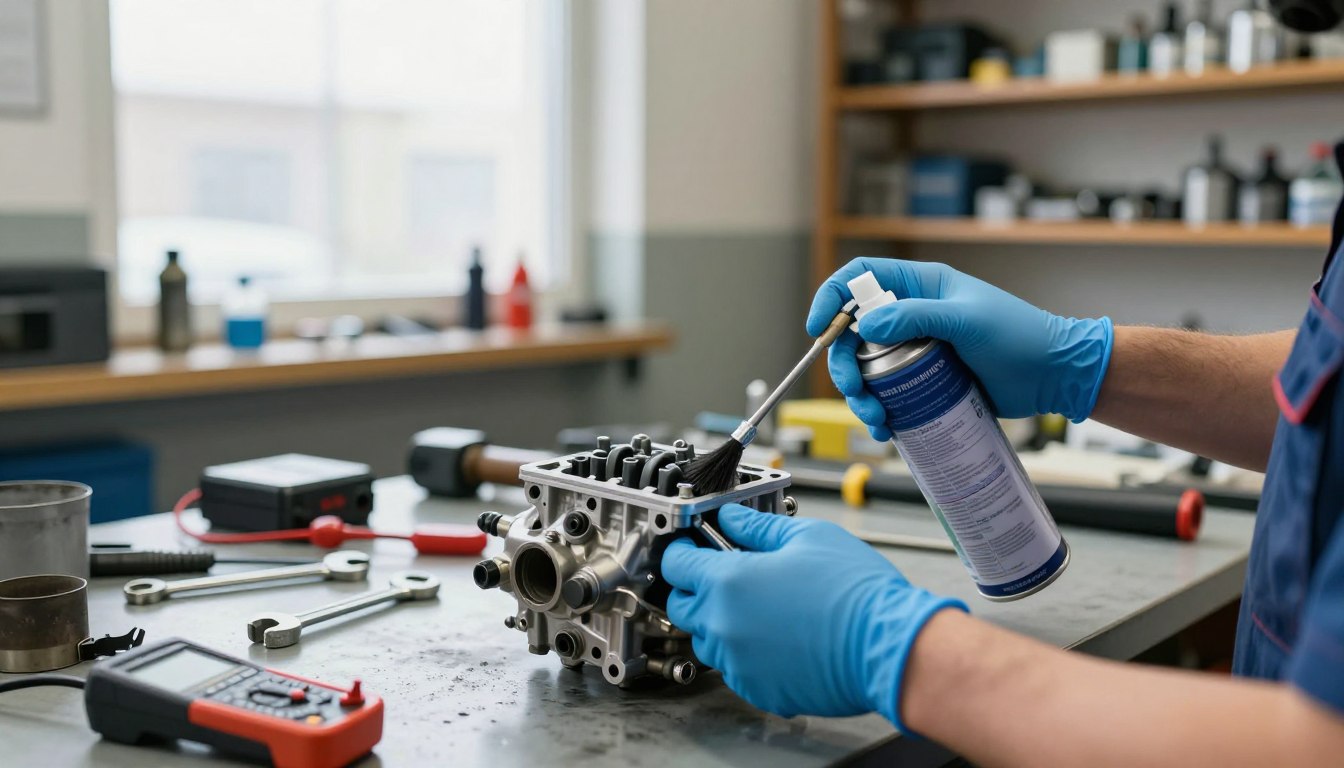
Cleaning your carburetor without completely disassembling it is a practical approach for many vehicle owners. This method allows for the removal of dirt and deposits that can affect engine performance without the need for extensive mechanical knowledge or specialized tools.
Cleaning the carburetor without complete disassembly involves using specialized cleaning solutions and techniques to target the areas most prone to dirt and deposit buildup. This includes spraying cleaning agents into the carburetor throat and other accessible openings to loosen and remove debris.
The process typically starts with accessing the carburetor and removing any external debris or dirt. Then, a cleaning solution is sprayed into the carburetor to target internal components such as the throttle plate and jets.
The primary benefit of cleaning the carburetor without disassembling it is the convenience and speed of the process. It is less invasive and requires less mechanical expertise, making it accessible to a wider range of vehicle owners.
Additionally, this method can be less time-consuming and may reduce the risk of damaging internal components, as it avoids the need to remove and reassemble various parts.
Key Benefits:
While cleaning the carburetor without complete disassembly can be effective for routine maintenance, there are situations where a more thorough cleaning or repair is necessary. If your vehicle is experiencing persistent performance issues or if the carburetor is heavily clogged, full removal and disassembly may be required.
In such cases, it is essential to weigh the complexity of the task against your mechanical abilities and consider seeking professional assistance if needed.
| Situation | Recommended Action |
|---|---|
| Routine maintenance | Cleaning without disassembly |
| Performance issues | Full removal and disassembly |
| Heavy clogging | Full removal and disassembly |
The first step in cleaning your carburetor involves locating it on your engine, a task that can vary significantly depending on the type of engine your vehicle has. Understanding the layout of your engine is crucial for this process.
The location of the carburetor can differ based on whether your vehicle has a inline engine, V6, or V8 engine. Typically, the carburetor is situated on top of the engine or attached to the intake manifold. For most vehicles, it’s relatively easy to find once you know what you’re looking for.
Once you’ve located the carburetor, the next step is to remove the air filter housing to gain better access. This usually involves unscrewing a few bolts or clips holding the housing in place. Be sure to gently pull the housing away from the carburetor to avoid damaging any connected components.
Tip: Consult your vehicle’s repair manual for specific instructions on removing the air filter housing for your particular vehicle model.
Before you start disassembling any parts, it’s a good idea to take photos of the carburetor and its connections. This visual documentation will be invaluable when it’s time to reassemble everything.
By following these steps, you’ll be well-prepared to move on to the next stage of cleaning your carburetor.
With the carburetor in sight, the next step is to clean its external components thoroughly. This process is crucial for removing dirt, grime, and other substances that can affect the carburetor’s performance and overall engine efficiency.
Begin by spraying a carburetor cleaner onto the exterior surface to loosen any dirt or grime. Make sure to cover all areas evenly, paying special attention to crevices and corners where debris tends to accumulate.
The throttle linkages and springs are critical components that require careful cleaning. Use a soft-bristled brush to gently scrub away any dirt or grime that may have built up on these parts. This will help ensure smooth operation and prevent any sticking or binding.
Dirt and grease can accumulate on the carburetor’s exterior, affecting its performance. Use a carburetor cleaning solution to dissolve and remove any stubborn buildup. Be sure to follow the manufacturer’s instructions for the cleaning solution and take necessary safety precautions.
After cleaning, use a lint-free cloth to wipe down all surfaces, removing any remaining dirt or cleaning solution. This step is essential to prevent any residue from interfering with the carburetor’s operation. Ensure all surfaces are dry before proceeding to the next step.
Now that you’ve accessed your carburetor, it’s time to dive into the internal cleaning process. Internal cleaning is a crucial step in carburetor maintenance that ensures your engine runs smoothly and efficiently.
The internal cleaning process involves several key steps, each targeting different components of the carburetor. By following these steps, you can effectively remove dirt and deposits that may be hindering your carburetor’s performance.
Begin by spraying a carburetor cleaner into the throat of the carburetor. This helps loosen any debris or varnish that may have built up inside. Make sure to use a cleaner specifically designed for carburetors to avoid damaging the components.

The choke plate and throttle plate are critical components that require regular cleaning. Use the carburetor cleaner to spray these parts, ensuring they move freely without any obstruction.
Jets and idle passages are prone to clogging due to their small size. Use a carburetor cleaning spray to target these areas, making sure to clear any blockages that may be affecting your engine’s performance.
For particularly stubborn clogs, a thin wire can be used to gently clear the blockage. Be cautious not to damage the delicate components of the carburetor.
Here’s a summary of the internal cleaning process in a tabular format:
| Component | Cleaning Method | Precautions |
|---|---|---|
| Carburetor Throat | Spray carburetor cleaner | Use specifically designed cleaner |
| Choke and Throttle Plates | Spray carburetor cleaner | Ensure free movement |
| Jets and Idle Passages | Spray carburetor cleaning spray | Avoid damaging small passages |
| Stubborn Clogs | Use a thin wire | Be gentle to avoid damage |
Maintaining a clean fuel bowl and float system is key to preventing engine issues. A dirty fuel bowl can lead to poor engine performance, decreased fuel efficiency, and potentially cause the engine to stall. In this step, we’ll guide you through the process of cleaning the fuel bowl and float system effectively.
Draining old fuel from the carburetor is a critical step in the cleaning process. To do this safely, ensure you are in a well-ventilated area and wear protective gloves. Use a container to catch the fuel and carefully loosen the drain screw. Be cautious, as the fuel may spill out quickly.
Once the fuel has stopped dripping, tighten the drain screw securely. Dispose of the old fuel responsibly, following local regulations for hazardous waste.
You can access the float bowl without completely removing the carburetor. Start by removing the air filter housing and taking photos for reference during reassembly. Then, locate the float bowl and remove the screws holding it in place. Gently pry the bowl loose, taking care not to damage any of the components.
Once you have accessed the float bowl, rinse it thoroughly with a carburetor cleaning solution. Use a soft-bristled brush to remove any stubborn dirt or debris. Ensure all parts are clean and free of old fuel residue.
After cleaning, inspect the bowl and its components for any damage. If you find any damaged parts, consider replacing them to maintain optimal engine performance.
By following these steps, you can effectively clean the fuel bowl and float system, improving your vehicle’s performance and fuel efficiency.
Now that you’ve cleaned the carburetor, it’s time to focus on flushing the fuel system to ensure your engine runs smoothly. This step is crucial for removing any remaining debris or contaminants that might have been missed during the carburetor cleaning process.
To start, you’ll need to add a fuel system cleaner to your fuel tank. This product is designed to break down and remove any varnish, gum, or other deposits that may be clogging your fuel system. When choosing a fuel system cleaner, look for a product that is compatible with your vehicle’s fuel type and follows the manufacturer’s instructions for use.
It’s essential to use a high-quality fuel system cleaner to avoid damaging your engine or fuel system components. Some popular brands include Sea Foam and Lucas Fuel Treatment. Always read the label and follow the recommended dosage to avoid over- or under-dosing your fuel system.
| Product | Compatibility | Dosage |
|---|---|---|
| Sea Foam | Gasoline, Diesel | 1 can per 15 gallons |
| Lucas Fuel Treatment | Gasoline, Diesel | 1 bottle per 15 gallons |
Before running the engine, ensure that all components are properly reconnected. This includes the air filter housing, throttle linkages, and any other parts you disconnected during the cleaning process. Double-check your work to prevent any issues when you start the engine.
With the fuel system cleaner added and all components reconnected, start the engine and let it run for a few minutes. This will allow the cleaner to circulate through the fuel system and help loosen any remaining debris. After running the engine, turn it off and inspect the area for any signs of leaks or other issues.
By following these final steps, you’ll be able to complete the carburetor cleaning process and ensure your engine is running at its best. Regular maintenance, including fuel system cleaning, can help extend the life of your engine and improve overall performance.
With the carburetor cleaned, the next step is to evaluate your vehicle’s performance and make any necessary adjustments. This critical phase ensures that your engine is running smoothly and efficiently.
After completing the cleaning process, start your engine and listen for any unusual sounds. A well-cleaned carburetor should result in a smoother engine operation. Check for any signs of leaks or issues around the carburetor area.
If the engine starts but runs rough, it might need some adjustments. This is where the real test begins, as you fine-tune the engine for optimal performance.
Adjusting the idle speed and mixture is crucial for achieving the right balance for your engine. The idle speed should be set according to the manufacturer’s specifications. You can find these details in your vehicle’s repair manual.
To adjust the idle mixture, you’ll need to turn the mixture screws slowly until you achieve the smoothest operation. This process may require some patience and trial and error.
Once you’ve adjusted the idle speed and mixture, it’s time to take your vehicle for a road test. Pay attention to how the vehicle accelerates and whether there are any signs of hesitation or stumbling.
A successful road test should show improved performance and fuel efficiency. If you notice any issues, you may need to revisit the adjustments or check for other potential problems.
If your vehicle still experiences issues after cleaning the carburetor and making adjustments, it’s essential to troubleshoot the problem. Check for any other potential causes, such as faulty spark plugs or clogged fuel filters.
| Issue | Possible Cause | Solution |
|---|---|---|
| Rough Idling | Incorrect idle mixture | Adjust idle mixture screws |
| Poor Acceleration | Clogged fuel filter | Replace fuel filter |
| Engine Stalling | Faulty spark plugs | Replace spark plugs |
By following these steps and making the necessary adjustments, you should be able to resolve most issues related to carburetor performance.
Regular carburetor cleaning is crucial for maintaining your vehicle’s engine performance. By following the steps outlined in this article, you can ensure your carburetor functions optimally, providing a smoother driving experience and better fuel efficiency.
Neglecting carburetor maintenance can lead to decreased engine performance, increased fuel consumption, and potentially costly repairs down the line. By staying on top of carburetor maintenance, you can avoid these issues and keep your vehicle running at its best.
With a clean carburetor, you can expect improved engine responsiveness, better acceleration, and a reduction in emissions. By incorporating regular carburetor cleaning into your vehicle maintenance routine, you’ll be taking a significant step towards maintaining peak engine performance and extending the lifespan of your vehicle.
Nếu bạn đang tìm kiếm một nền tảng giải trí trực tuyến vừa uy tín lại vừa đa dạng sản phẩm, thì mã nhận thưởng 888slot chính là lựa chọn hàng đầu hiện nay. Với hệ sinh thái tích hợp từ slot, casino live đến cá cược thể thao và e-sports, người chơi có thể thỏa mãn mọi nhu cầu chỉ trong một tài khoản duy nhất. TONY02-26H