Address
304 North Cardinal St.
Dorchester Center, MA 02124
Work Hours
Monday to Friday: 7AM - 7PM
Weekend: 10AM - 5PM
Address
304 North Cardinal St.
Dorchester Center, MA 02124
Work Hours
Monday to Friday: 7AM - 7PM
Weekend: 10AM - 5PM

Every rider loves the smooth hum of a well-tuned machine. However, a clicking or tapping sound often ruins the experience for many bikers. Achieving a quiet motorcycle engine starts with understanding what happens inside your cylinder head.
The most common culprit for unwanted noise is incorrect valve clearance. These tiny gaps ensure your engine breathes correctly and manages heat during long rides. If the gap is too large, you will hear a constant metallic rattling.
Performing a regular motorcycle valve adjustment keeps your bike running at peak performance. It also prevents long-term wear on vital engine components. Taking the time to fine-tune these settings will make your ride feel brand new again.
This guide explains why these small measurements matter so much. You will learn how to identify symptoms of loose valves and the benefits of a perfectly balanced valvetrain.
A motorcycle engine’s valve train is a complex system, and when it starts making noise, it’s crucial to understand the underlying causes. Valve noise can manifest as a ticking, clicking, or clattering sound emanating from the engine area. This noise is often a symptom of an issue that needs attention.
Valve clearance, the gap between the valve stem and the rocker arm or cam follower, plays a significant role in engine sound. When this clearance is not set according to the manufacturer’s specifications, it can lead to increased noise. Proper valve clearance is essential for the smooth operation of the valve train. If the clearance is too loose, the valves may not close properly, resulting in a loud ticking or clattering noise. Conversely, if the clearance is too tight, it can cause the valves to remain partially open, leading to engine performance issues and potentially damaging the valve train components.
The engine sound is directly influenced by the valve clearance because it affects how the valves open and close. When the clearance is correct, the valves operate smoothly and quietly. However, when the clearance is off, it can cause the valves to slam shut or not close fully, leading to noise.
The science behind valve train noise is rooted in the mechanics of how the valves operate. The valve train consists of several components, including the camshaft, valves, rocker arms, and lifters. When these components are not properly adjusted or are worn out, they can cause noise. The noise is typically generated by the mechanical interaction between these parts, particularly when there is excessive play or wear.
For instance, when the valve clearance is too loose, the rocker arm or cam follower can move excessively, striking the valve stem with more force than necessary. This impact can produce a clicking or ticking noise. Similarly, worn-out components can cause irregular motion, leading to various types of noise.
Maintaining proper valve clearance is not just about reducing noise; it’s also crucial for engine health. Incorrect valve clearance can lead to premature wear on valve train components. If the clearance is too loose, the increased impact between components can cause them to wear out faster. On the other hand, if the clearance is too tight, it can lead to overheating and potential seizure of the valves.
Furthermore, proper valve clearance ensures that the engine operates efficiently. When the valves are correctly adjusted, they open and close at the right time, allowing for optimal engine performance. This not only improves the overall riding experience but also helps in maintaining the longevity of the engine.
Recognizing the signs that your motorcycle valves need adjustment is crucial for maintaining optimal engine performance. Valve adjustment is a critical maintenance task that ensures your motorcycle runs smoothly and efficiently. Ignoring the need for valve adjustment can lead to decreased performance, fuel efficiency, and potentially cause damage to your engine.
One of the most common indicators that your motorcycle valves need adjustment is the presence of unusual noises coming from the engine, such as ticking or clicking sounds. These noises are often a result of improper valve clearance, which can cause the valves to not fully close or open, leading to noise. As a rider, being familiar with the normal sound of your motorcycle’s engine is key to identifying when something is amiss.
“A well-maintained engine is the heart of a motorcycle’s performance and longevity.”
If you notice a decrease in your motorcycle’s engine performance or a loss of power, it could be a sign that your valves are out of adjustment. Proper valve clearance is essential for optimal engine operation. When valves are not adjusted correctly, it can lead to poor combustion, reduced power output, and decreased overall performance.
| Signs | Description | Possible Cause |
|---|---|---|
| Ticking or Clicking Noises | Unusual sounds from the engine area | Improper valve clearance |
| Reduced Performance | Noticeable decrease in power or efficiency | Valves out of adjustment |
| Difficulty Starting | Engine hard to start or stalls frequently | Incorrect valve clearance affecting engine operation |
Difficulty starting your motorcycle or experiencing frequent stalling can be related to valve adjustment issues. When valves are not properly adjusted, it can affect the engine’s ability to start or run smoothly. This is because the engine relies on precise valve operation to maintain the correct compression and combustion process.
Unusual vibrations when your motorcycle is idling can also be a sign that your valves need adjustment. Proper valve clearance helps in maintaining smooth engine operation. When the clearance is off, it can cause vibrations due to the irregular operation of the engine’s valves.
Being aware of these signs and addressing them promptly can help in maintaining your motorcycle’s health and performance. Regular motorcycle maintenance, including valve adjustment, is essential for a smooth riding experience.
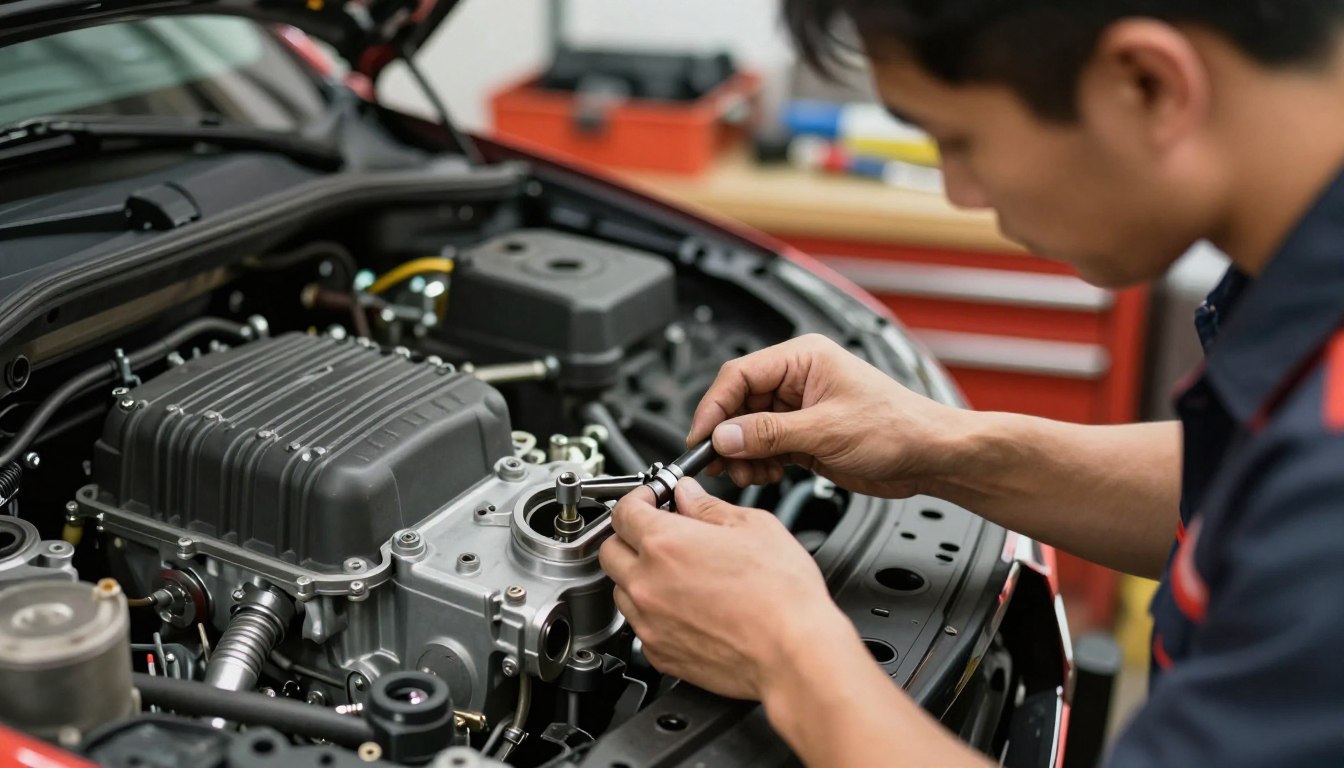
The key to a smooth valve adjustment lies in having the correct tools and materials at your disposal. Before you begin, it’s essential to understand what you’ll need to complete the task efficiently and effectively.
For most valve adjustments, you’ll start with basic hand tools that are likely already in your toolbox. These include:
A comprehensive socket set and a selection of wrenches are fundamental. They provide the versatility needed for various tasks, from removing the valve cover to adjusting the valves themselves. Ensure your socket set includes both metric and standard sizes to accommodate different motorcycle models.
Both flathead and Phillips-head screwdrivers are necessary for various adjustments and removals. Additionally, a set of Allen keys will be required for bolts that need to be loosened or tightened during the process. Having the correct size is crucial to avoid damaging the bolt heads.
Beyond basic hand tools, you’ll need specialized equipment to measure and adjust the valve clearance accurately.
Feeler gauges are critical for measuring the clearance between the valve stem and the rocker arm or cam follower. Choose feeler gauges that are precision-made and corrosion-resistant to ensure accurate measurements. To use them correctly, select the appropriate thickness and gently slide it between the valve stem and the rocker arm. The fit should be snug but not tight.
A torque wrench is indispensable for tightening bolts to the manufacturer’s specified torque. This ensures that components are securely fastened without being over-tightened, which could damage the engine. Calibration of your torque wrench is essential for accuracy.
Safety should never be overlooked when working on your motorcycle. Ensure you have:

By gathering these essential tools and materials and setting up your workspace properly, you’ll be well-prepared to tackle the valve adjustment with confidence.
Before diving into the valve adjustment process, it’s essential to prepare your motorcycle properly. This preparation ensures that the process is done efficiently and safely.
The first step in preparing your motorcycle is to allow the engine to cool down completely. This is crucial because working on a hot engine can lead to burns and other injuries. It’s recommended to let the engine sit for at least 30 minutes after riding. This cooling period allows the engine components to return to a safe temperature, making it easier and safer to work on.
To access the valves, you need to remove the valve cover. Start by locating the valve cover, which is typically held in place by bolts. Use the appropriate socket or wrench to remove these bolts, and gently pry the cover off. Be careful not to damage the gasket or the cover itself. Once removed, inspect the gasket for any signs of wear or damage. If it’s damaged, consider replacing it to prevent leaks.
Locating Top Dead Center (TDC) on the compression stroke is critical for accurate valve adjustment. To do this, you’ll typically need to rotate the engine while observing the position of the piston or using a timing mark on the flywheel or crankshaft. Consult your motorcycle’s service manual for specific instructions, as the process can vary between models.
Before proceeding with the valve adjustment, it’s essential to clean the valve train area thoroughly. Dirt, grime, and old lubricant can interfere with your measurements and the overall adjustment process. Use a soft brush and a suitable cleaning solvent to remove any debris. Ensure that the area around the valves is clean and free from obstructions.
By following these steps, you’ll be well-prepared to adjust your motorcycle’s valves accurately and safely. Proper preparation is key to a successful valve adjustment, ensuring your motorcycle runs smoothly and quietly.
Valve clearance adjustment is a simple yet effective way to minimize engine noise. Properly adjusted valves not only reduce noise but also improve engine performance and longevity. In this section, we will guide you through the step-by-step process of adjusting your motorcycle’s valves.
The first step in adjusting your motorcycle’s valves is to measure the current valve clearance using feeler gauges. Feeler gauges are thin, precision-made blades used to measure the gap between two parts. To measure the valve clearance, locate the valve you want to check and insert the appropriate feeler gauge between the valve stem and the rocker arm or camshaft.
Tip: Ensure the engine is cool before starting the measurement to get accurate readings.
It’s crucial to identify whether you are adjusting intake or exhaust valves, as they have different clearance specifications. Typically, intake valves have a smaller clearance than exhaust valves. Consult your motorcycle’s manual to determine the correct specifications for your bike.
Once you’ve identified the valve and measured its clearance, the next step is to loosen the adjuster lock nut. This nut holds the adjuster in place, and loosening it allows you to make adjustments. Use a wrench to loosen the lock nut, but do not remove it yet.
With the lock nut loosened, you can now adjust the valve clearance. Turn the adjuster until the clearance matches the manufacturer’s specifications. This information can be found in your motorcycle’s repair manual.
After adjusting the clearance, tighten the lock nut while holding the adjuster in place. Once tightened, recheck the clearance to ensure it hasn’t changed during the tightening process.
If your motorcycle has multiple cylinders, you’ll need to rotate the engine to adjust the valves for each cylinder. Follow the firing order of your engine, as specified in the manual, to ensure you’re adjusting the correct valves for each cylinder.
| Cylinder | Intake Valve Clearance | Exhaust Valve Clearance |
|---|---|---|
| 1 | 0.10 mm | 0.15 mm |
| 2 | 0.10 mm | 0.15 mm |
| 3 | 0.10 mm | 0.15 mm |
| 4 | 0.10 mm | 0.15 mm |
By following these steps, you can ensure your motorcycle’s valves are properly adjusted, reducing engine noise and improving overall performance.
Valve clearance specifications are crucial for maintaining the performance and longevity of your motorcycle’s engine, varying significantly across different motorcycle types. Understanding these specifications is key to ensuring your motorcycle runs smoothly and efficiently.
Sport bikes and high-performance motorcycles typically require more precise valve clearance due to their high-revving engines. These engines often have a narrower valve clearance tolerance to minimize noise and optimize performance at high RPMs. For example, some sport bikes may require a valve clearance of 0.003 to 0.005 inches for both intake and exhaust valves.
Cruisers and touring bikes, on the other hand, usually have larger engines with different performance characteristics. They may have a slightly looser valve clearance tolerance compared to sport bikes, often around 0.004 to 0.006 inches. This is because they prioritize low-end torque and comfort over high-RPM performance.
Dirt bikes and off-road motorcycles are subjected to harsh conditions and require valve clearance specifications that can withstand the rigors of off-road riding. Their valve clearance might be slightly looser, typically around 0.005 to 0.007 inches, to accommodate the vibrations and stresses associated with off-road use.
To find the exact valve clearance specifications for your motorcycle, you should consult your owner’s manual or the manufacturer’s website. Many manufacturers provide detailed service manuals that include this information. If you’re still unsure, contacting a local dealership or a professional mechanic familiar with your motorcycle’s brand can provide the necessary guidance.
The following table summarizes typical valve clearance specifications for different types of motorcycles:
| Motorcycle Type | Typical Valve Clearance (Intake) | Typical Valve Clearance (Exhaust) |
|---|---|---|
| Sport Bikes | 0.003 – 0.005 inches | 0.003 – 0.005 inches |
| Cruisers/Touring | 0.004 – 0.006 inches | 0.004 – 0.006 inches |
| Dirt Bikes/Off-Road | 0.005 – 0.007 inches | 0.005 – 0.007 inches |
After completing the valve adjustment, it’s crucial to reassemble the components correctly and test the engine to ensure the desired results. This step is vital for confirming that the valve adjustment has been successful and that the engine is running smoothly and quietly.
Begin by installing a new valve cover gasket to prevent leaks and ensure a tight seal. This is a critical step as it directly affects the engine’s performance and longevity. Make sure to clean the mating surfaces before installing the new gasket.
When tightening the valve cover bolts, follow the manufacturer’s recommended torque sequence to avoid damaging the cover or stripping the threads. Proper torque specification is crucial for maintaining the integrity of the engine.
Perform a cold start test to check for any abnormalities in engine noise or performance. Start the engine when it’s cold, and listen carefully for any unusual sounds. This test is an effective way to identify if the valve adjustment has been successful.
After completing the reassembly and testing, listen for improved engine quietness. A successful valve adjustment should result in a quieter engine operation. If the engine still produces excessive noise, it may be necessary to revisit the adjustment process.
Regular maintenance, including proper valve adjustment and reassembly, is key to extending the life of your motorcycle’s engine and ensuring optimal performance.
Valve adjustment is a delicate process, and understanding the pitfalls can save you from potential engine damage. When working on your motorcycle’s engine, being aware of common mistakes can make a significant difference in the outcome.
One of the most critical errors is adjusting the valves when the engine is still hot. Engine components expand when heated, which can lead to inaccurate clearance measurements. It’s essential to let the engine cool down completely before starting the adjustment process.
Using the wrong clearance specifications is another common mistake. Always refer to your motorcycle’s service manual for the correct specifications. Different models have different requirements, and using the incorrect specs can result in improper valve clearance.
Forcing feeler gauges between the valve and cam can damage these components. Gently insert the feeler gauge until you feel a slight drag, indicating the correct clearance. Forcing it can lead to wear or damage.
After adjusting the clearance and tightening the lock nuts, it’s crucial to recheck the clearance. The tightening process can sometimes alter the adjustment, so verifying it ensures accuracy.
Mixing up the intake and exhaust valve settings is a mistake that can lead to poor engine performance. Double-check the specifications for each type of valve and ensure you’re adjusting them correctly according to the manufacturer’s guidelines.
By being aware of these common valve adjustment mistakes, you can ensure a successful and effective valve adjustment process for your motorcycle.
When valve noise persists after adjustment, it’s crucial to investigate further to identify the root cause. Persistent valve noise can be more than just an annoyance; it may indicate underlying problems that could lead to more severe engine damage if left unaddressed.
“Valve noise is a symptom, not a disease,” says a renowned motorcycle mechanic. “Understanding the cause is key to applying the right fix.” This section will guide you through the process of troubleshooting persistent valve noise issues, helping you identify potential causes and determine the best course of action.
If you’ve adjusted your motorcycle’s valves according to the manufacturer’s specifications and still experience noise, it’s time to look deeper. Sometimes, the issue isn’t with the adjustment itself but with other components of the valve train.
One common reason for persistent noise is worn or misaligned components. Over time, parts like camshaft lobes, lifters, and valve stems can wear out, leading to increased noise levels.
Worn camshaft lobes and lifters are a common cause of persistent valve noise. The camshaft lobes and lifters work together to operate the valves. When these components wear out, they can cause the valves to open and close less smoothly, resulting in noise.

Inspecting the camshaft lobes and lifters requires a thorough examination. Look for signs of wear, such as pitting or excessive wear on the lobes. If you find any damage, it may be necessary to replace these components.
Damaged valve springs or retainers can also cause persistent valve noise. Valve springs are under constant tension, and over time, they can weaken or break. Similarly, retainers can become damaged or worn, affecting the valve’s operation.
To diagnose issues with valve springs or retainers, you’ll need to inspect them closely. Look for signs of damage, such as cracks or excessive wear. Replacing damaged components is crucial to restoring proper valve function and eliminating noise.
While many valve adjustments can be done at home, persistent valve noise issues may require professional assistance. If you’ve checked the obvious causes and the noise persists, it’s time to consult a professional mechanic.
A professional mechanic has the tools and expertise to diagnose complex issues and perform necessary repairs. They can help you identify the root cause of the problem and recommend the best course of action.
In conclusion, troubleshooting persistent valve noise requires patience and a systematic approach. By understanding the potential causes and knowing when to seek help, you can keep your motorcycle running smoothly and quietly.
To keep your motorcycle engine purring like new, a well-planned maintenance schedule is essential. Regular maintenance not only ensures the longevity of your motorcycle’s engine but also enhances its performance and overall riding experience.
One crucial aspect of this maintenance is the adjustment of valves at recommended intervals. Valve clearance affects not just the engine’s performance but also its longevity.
The frequency for adjusting valves varies significantly across different motorcycle models and manufacturers. Generally, most manufacturers recommend checking and adjusting valves every 4,000 to 8,000 miles. However, it’s critical to consult your motorcycle’s owner’s manual for the manufacturer’s specific recommendations.
Riding conditions play a significant role in the wear and tear of your motorcycle’s valve train. Certain conditions can accelerate the need for valve adjustments.
Extreme temperatures: Both high and low temperatures can affect engine performance and valve clearance.
Frequent stop-and-go traffic: This type of riding can cause more strain on the engine and valves compared to steady, long-distance riding.
Maintaining a detailed record of all maintenance activities, including valve adjustments, is crucial for tracking the history of your motorcycle’s care. This not only helps in planning future maintenance but also adds value if you decide to sell your motorcycle.
The quality of engine oil used in your motorcycle significantly impacts the health of the valve train. High-quality engine oil provides better lubrication, reduces wear on moving parts, and helps maintain the engine’s overall health.
Choosing the right oil: Always refer to your owner’s manual for the recommended oil viscosity and type.
By following these guidelines and maintaining a rigorous maintenance schedule, you can ensure your motorcycle’s engine remains in top condition, providing a smoother, more enjoyable ride.
Proper valve adjustment is crucial for a quieter and healthier motorcycle engine. By understanding the causes of valve noise and following the step-by-step process outlined in this article, riders can enjoy a smoother and more enjoyable riding experience. Regular motorcycle maintenance, including valve adjustments, is essential for extending the life of the engine and preventing costly repairs.
The benefits of valve adjustment are numerous, including a quiet engine and improved overall performance. By incorporating valve adjustments into your regular maintenance routine, you can ensure your motorcycle runs efficiently and effectively. This not only enhances your riding experience but also contributes to the longevity of your vehicle.
By applying the knowledge gained from this article, riders can take the first step towards a more enjoyable and stress-free riding experience. Proper valve adjustment is a simple yet effective way to maintain your motorcycle’s health and performance.